Quantcast
Channel: Tips - Nerd's Chalk
Viewing all 2963 articles
Browse latest View live

How to install ClockworkMod Recovery (CWM) on HTC Desire Eye [TWRP alternative]

$
0
0

CWM recovery Desire Eye

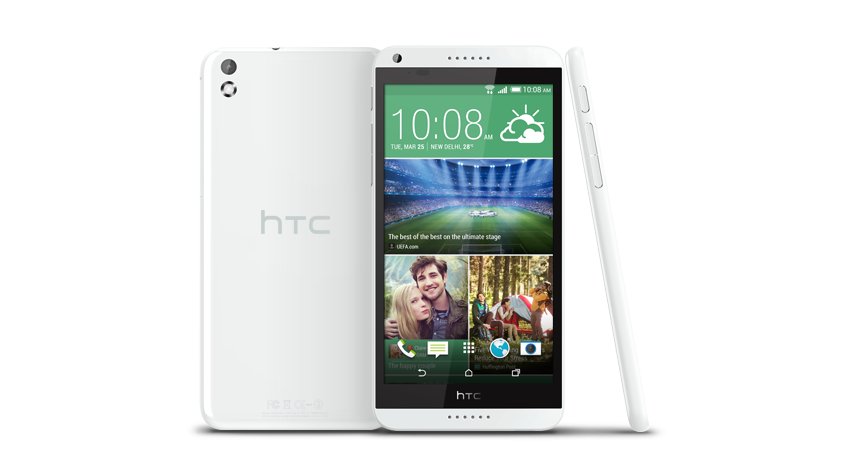
The latest touch version of HTC Desire Eye ClockworkMod Recovery is now available for download and installation. If you love to flash ROMs and mods on your Desire Eye, you already know why you need this. Basically, you need recovery to be able to install custom ROMs and mods, and also create nandroid backups, restoring which takes you back to current state of the phone, ditto.

CWM Recovery is a very popular recovery, and quite good even though it’s lost the crown of favorite recovery to TWRP for us and many of you. The CWM recovery for HTC Desire Eye we’ve got here is a touch enabled version, something you definitely crave for now a days.

Installing the recovery requires the bootloader of your HTC Desire Eye to be unlocked. Then you’ll be able to flash the recovery on your device using the fastboot command. We’ve got all the necessary downloads and instructions covered below for you, so just head on to guide below to unlock full potential of your Desire Eye by installing a custom recovery in CWM, am alternative to TWRP recovery.

Supported models:
  • HTC Desire Eye, international version (not AT&T)
  • Don’t try on AT&T Desire Eye
  • Don’t try on any other Android device
Downloads
Installation Instructions

WARNING: Warranty may be void of your device if you follow the procedures given on this page. You only are responsible for your device. We won’t be liable if any damage occurs to your device and/or its components.

Important Note: Backup important files (music, photos, documents, videos, etc.) stored on your device before proceeding with the steps below. If you have not unlocked bootloader of your device already, you will be required to do that now, and that will delete everything on your phone. So, must do backup before attempting the guide below.

  1. Get ADB installed and properly working on your PC first. Check out our ADB installation guide for this. Come back to this guide after installing ADB.
  2. Unlock bootloader of your HTC Desire Eye if you haven’t don that already. For help, check out this page or help, it details out how you unlock bootloader on all HTC devices, using company’s own method for the purpose.
  3. Reboot Desire Eye into fastboot mode:
    1. Power off your device first. Wait for 5-6 seconds after screen goes off.
    2. Press and hold Power+Volume Down together for few seconds until you reach bootloader mode (white screen.
    3. Move selection to FASTBOOT using volume keys and then press power button to select it. You’ll enter fastboot mode.
  4. Connect Desire Eye to PC now. FASTBOOT will change to FASTBOOT USB. You must get this, otherwise you cannot proceed.
  5. Open the folder on your PC where you have the Desire Eye CWM recovery file: cyangenrecovery_eyeul.zip. Rename the file to something easy, like, cwm-eyeul.zip. We are to use the name of this file in command you enter in step 7 below.
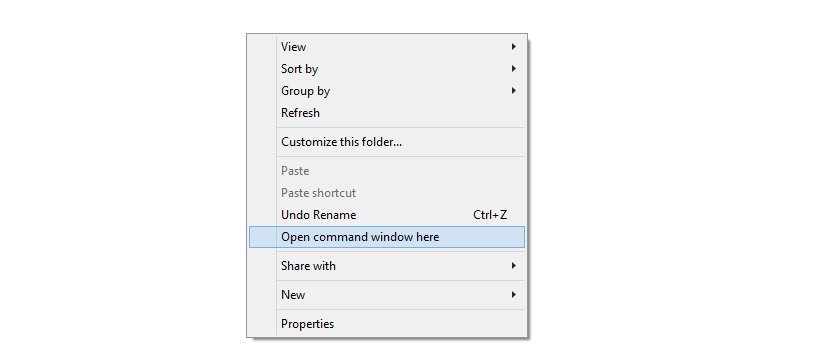
  6. Open the command window at the location where you have the CWM recovery:
    1. Left click on any empty white space inside the folder and then press shift+right click to get a pop-up as shown below.
      open command windows here
    2. Select the option: Open command window here
  7. Copy the command below, and paste it in command window. Then hit enter to begin flashing the CWM recovery on your Desire Eye. (Replace flash recovery with boot in the command below if you want to test it first.)
    fastboot flash recovery cwm-eyeul.img
  8. Once done, type the below and hit enter key to restart your device.
    fastboot reboot
  9. Optional: Take a backup now. With CWM installed, the first thing you should do is take backup. It’s highly recommended! Boot into bootloader mode as given above and then select recovery mode from there. When in CWM recovery, select backup option to create a full backup of your phone, a mirror copy that is very useful if you screw up when trying to install custom ROMs and mods.

Happy flashing on your Desire Eye!

If you need any help with this, let us know via comments section below. We will try our best to help you.

The post How to install ClockworkMod Recovery (CWM) on HTC Desire Eye [TWRP alternative] appeared first on The Android Soul.


How to Root Asus Zenfone 2 with CWM Recovery and SuperSU

$
0
0

root zenfone 2

Well, this should lift the mood of owners of shiny new Asus Zenfone 2 — the ClockworkMod recovery, aka CWM, is now available for their device, though, not as permanent installation. You’ll boot into CWM recovery right after installation, but once you’re out of recovery, it will be automatically removed from phone. But anyway, that brings the ability to root your Zenfone 2 pretty easily, whichever firmware your are on, without the need of installing a given pre-rooted firmware.

And guess what, installation of the CWM recovery is super-damn-easy too. You just have to download the required stuff and have to run just one file and follow two little steps and you’ll in CWM recovery mode soon.

You have to thank 29y6145 user over at XDA for this, who broght this to Zenfone 2 using the original work of another user, social-design-concepts, on Intel powered phones with locked bootloaders. And of course, Chainfire, for the SuperSU file.

With the CWM recovery on your Zenfone 2, you can also create nandroid backup, something we depend on very much. It’s a lifesaver feature of custom recoveries, be it CWM or TWRP. While there is no news of TWRP for Zenfone 2 yet, we really hope it should come to the device. No ETA, though!

There are apparently lots of benefits of installing a CWM recovery on Zenfone 2, and root is chief of them. Apart from pre-rooted firmware, which are region specific, no good root solution is available. But with the availability of CWM recovery, you can flash Chainfire’s SuperSU root package on your Zenfone 2 to root it, and that makes up for the best root solution too, thanks to ClockworkMod recovery.

Let’s see how to install Zenfone 2 CWM recovery.

Supported models:
  • Asus Zenfone 2, model no. ZE550ML and ZE551ML
  • Don’t try on any other Android device
Downloads
Installation Instructions

WARNING: Warranty may be void of your device if you follow the procedures given on this page. You only are responsible for your device. We won’t be liable if any damage occurs to your device and/or its components.

Important Note: Backup important files (music, photos, documents, videos, etc.) stored on your device before proceeding with the steps below. There are chances that everything on your phone might get deleted, hence the need for appropriate backup of files and contacts.

  1. If you don’t have ADB drivers installed already, do so now by following our ADB installation guide. Come back to this guide after installing ADB.
  2. Also, you need to have Asus drivers installed. Download from here and install them if you haven’t got them already.
  3. Make sure your Zenfone 2 is powered ON, and connected to PC.
  4. Transfer the Root package file, UPDATE-SuperSU-v2.46.zip, to your Zenfone 2. (Remember its location, we will need this in step 10 below).
  5. Extract the CWM recovery file you downloaded from above to a folder, using a free software like 7-zip. You should get files as seen in the image right below.
    cwm zenfone 2
  6. Double click on cai_dat_CWM.bat file to run recovery installer tool to start installing the CWM recovery on Zenfone 2.
    cwm recovery asus zenfone 2
  7. Type ACCEPT and then hit enter key in the command prompt window that comes up, and you will be presented with various options.
    asus zenfone 2 cwm recovery
  8. Type T4 and then hit enter key to begin flashing of CWM recovery.
  9. After flashing of CWM recovery on Zenfone 2 is done by the tool, you’ll boot into CWM recovery automatically.
  10. Choose Install zip from sdcard option and then select the root package file UPDATE-SuperSU-v2.46.zip (from step 4).
  11. Select Yes on next screen to confirm flashing of root.
  12. When done, go back and select reboot system now to restart the Zenfone 2.
  13. [Optional] Download an app like Root Checker to confirm root access on your Zenfone 2.

That’s it.

Enjoy root access and root apps.

If you need any help regarding this, sure let us know via comments below. We’ll be try our best to help you out.

The post How to Root Asus Zenfone 2 with CWM Recovery and SuperSU appeared first on The Android Soul.

How to enable Tethering on Sprint HTC One M9

$
0
0

Tethering Sprint HTC One M9

Although Sprint is yet to launch the HTC One M9, we’ve already got ours hands on a very useful trick that you’ll surely end up craving for. Tat is, enabling the tethering on Sprint HTC One M9. Carriers like to disable even the basic Android features that would turn into more revenue for them, but thanks to developer community Android enjoys, you are able to root your Android device, and make desired changes to system partition to get the enable the disabled necessary features.

You need root access to be able to make some changes to system partition that enable the tethering on your Sprint HTC One M9. So, make sure you’ve rooted your device as that’s a pre-requite of this trick.

Next up you will need to play with SQLite Editor Android app, making some certain changes to a database file. When you’re ready with your rooted Sprint HTC One M9, go and check out the guide below.

Downloads
  • Tether file (1 KB) | Filename: 55tether

Warning: Warranty may be void of your device if you follow the procedures given on this page. You only are responsible for your device. We won’t be liable if any damage occurs to your device and/or its components.

Make a Backup. It’s important to create a backup of important files (music, photos, documents, videos, etc.) stored on your device before proceeding with the steps below. There are chances that everything on your phone might get deleted, hence the need for appropriate backup of files and contacts.

  1. Make sure your Sprint HTC One M9 is rooted. If not, Google for it.
  2. Install the SQLite Editor app from play store.
  3. Open the app and provide it root access.
  4. Tap on Open Database
  5. Browse to system partition, and then to this folder: /data/data/com.android.providers.telephony/databases
  6. Select the file Cdmaapn.db
  7. You have to make certain additions to the database here. Select carriers
  8. Edit the entry LTE-SPCS INTERNET: under the type column of this entry, add the below at the very end
    ,dun
  9. Also edit the entry eHRPD-SPCS INTERNET: again, under type column, add the below at the very end
    ,dun
  10. Look at the screenshot right below. This is how it should look.
    Enable WiFi Tethering Sprint HTC One M9
  11. Now, download the file named 55tether provided above and transfer it anywhere on phone for the time being.
  12. Download any root file explorer app, like ES file explorer.
  13. Provide root access to ES file explorer:
    1. Open the app
    2. Slide from left edge to right
    3. From the menu, under tools, tap on Root explorer
    4. Grant root permission on pop-up that shows up
  14. Go to 55tether file on your phone (from step 11) and copy it.
  15. Go to this system folder and paste the 55tether file: system > etc > init.d
  16. Set the permission of the 55tether file same as other files in the folder. To set permission, long press the file, then tap on More > Properties > Permissions. Have a look at permissions of other files first so that you know what permissions you have to set.
  17. Go back, and out of ES file explorer. Reboot the phone now to apply the changes.

Check the settings, tethering should be alive now.

Let us know if you need any help with this. And also do tell us how it worked for you.

Via thicklizard!

The post How to enable Tethering on Sprint HTC One M9 appeared first on The Android Soul.

How to update Sony Xperia Z2 to Lollipop update v23.1.A.1.28 with root and recovery pre-installed

$
0
0

Xperia Z2 Lollipop update v23.1.A.1.28

If you are looking to update your Sony Xperia Z2 to latest Lollipop update firmware v23.1.A.1.28, and want to keep root access and the DUAL Recovery installed, look no further than the custom ROM based on stock Lollipop update we’ve got below. The ROM is based on latest firmware v23.1.A.1.28, and is pre-rooted, plus has the locked dual recovery.

For advanced Android users, it’s a given that they are all into root and recovery stuff. And as much as we enjoy it, it becomes a slight cause of concern to when one is looking to install the latest of updates, which breaks root and removes recovery for the most part. Thus we always try to share the stock firmware in untouched form like this one, except for the addition of root and recovery, a must for your customization needs.

Before you march forward to latest Lollipop update for your Sony Xperia Z2, know that this ROM is compatible with model no. D6503 only — and no other device whatsoever. So, do check it in your phone’s settings or on box before attempting to install this firmware. Credits for the ROM goes to nokian70.

Downloads

Supported models

  • SONY Xperia Z2, model no. D6503
  • Don’t try on any other device whatsoever

Instructions

Warning: Warranty may be void of your device if you follow the procedures given on this page. You only are responsible for your device. We won’t be liable if any damage occurs to your device and/or its components.

Backup necessary stuff. In case your device is wiped off, it’s good to have backup of contacts, photos, videos and other files. Hence, create a backup of important stuff in your phone right away.

  1. Download the ROM from above, and transfer it to phone’s storage. Remember the location where you put it.
  2. Make sure you’ve got a custom recovery like TWRP, CWM or Philz installed on your Sony Xperia Z2. For help, check this page.
  3. Reboot into recovery mode. Once you’ve installed the recovery as mentioned on the page linked above, do this to boot into recovery mode:
    1. Power off your Xperia Z2.
    2. Power on the device but be sure to press the Volume Down button when you see green LED light flashing (phone will also vibrate).
      (Btw, you can also press Volume up in place of volume down to boot into Philz touch recovery if that’s more to your liking.)
  4. Make a backup. Once in TWRP recovery, take a backup of your current ROM. Select Backup, then do a “Swipe to Back Up” on the bottom of the screen. Wait for the backup to finish, it’s a time consuming process.
  5. Wipe your device. Once the backup is finished, do this: tap on Wipe, then Advanced wipe, and then select Cache, Dalvik/ART cache and Data. Then do the “Swipe to wipe” at bottom to ready the device for ROM flashing by erasing the cache, dalvik cache and data in one shot.
  6. Install ROM now. Go back to the main menu of TWRP recovery and select Install. Navigate to the file where you saved your ROM’s zip file, select it and “Swipe to Confirm Flash” on the bottom of the screen. Now wait until the flashing process finishes.
  7. Go to back to recovery’s Main menu, select Reboot » select System.

Device will restart and you will have the latest Xperia Z2 Lollipop update firmware v23.1.A.1.28 running, that’s pre-rooted, and your phone also has dual recovery (TWRP and CWM) installed.

That’s it. Let us know if you know any help with TWRP recovery installation or anything with update process, via comments section below.

The post How to update Sony Xperia Z2 to Lollipop update v23.1.A.1.28 with root and recovery pre-installed appeared first on The Android Soul.

How to Speed up AT&T Galaxy S6 by flashing a debloated OE2 based custom ROM

$
0
0

Speed Up AT&T Galaxy S6

Of course, the Galaxy S6 you have in your hand is the one of the fastest devices on Android. After all, it houses the fastest chip in Exynos 7420, and its Touchwiz isn’t that much bloatware laden as its previous versions. But anyway, it’s still got Touchwiz, Samsung’s custom UI over Android, and set of Samsung apps that keep hogging your device from time to time. No wonder many people deem Nexus 5 slightly smoother and faster than Galaxy S6 many a times.

You can achieve faster speed in operations on your AT&T Galaxy S6 by using a debloated ROM that’s got rid of not-so-useful Samsung apps already, and thus gets lots of free RAM for using the phone as you would. That means removing the Samsung apps like S-Voice, Videos, KNOX, Facebook messenger, etc. to name a few. Check the full list of the apps removed from the official page given at downloads section. Credit for the ROM goes to Rayman360, thanks!

Let’s see how to install the pre-rooted OE2 firmware based ROM on your AT&T Galaxy S6, with unnecessary apps removed.

Downloads

(Download the latest version of the ROM from the official page here.)

Supported models

  • AT&T SAMSUNG GALAXY S6, model no. SM-G920A
  • Don’t try on Galaxy S6 sets at Verizon, T-Mobile, AT&T, US Cellular or the Canadian, Korean and International variants.
  • Don’t try on any other device whatsoever

Instructions

Warning: Warranty may be void of your device if you follow the procedures given on this page. You only are responsible for your device. We won’t be liable if any damage occurs to your device and/or its components.

Backup necessary stuff. In case your device is wiped off, it’s good to have backup of contacts, photos, videos and other files. Hence, create a backup of important stuff in your phone right away.

  1. Update your AT&T Galaxy S6 to OE2 firmware, if it’s not running the OE2 build already. (Check in Settings > About phone.)
  2. Root your AT&T Galaxy S6 on OE2 firmware.
  3. Download the ROM file (Ultra Light 1.0 – UCU1AOE2 .zip), and transfer it to phone’s storage. Remember the location where you put it.
  4. Download the Flashfire android app that we will use to flash the ROM:
    1. Login into Google using the same Gmail ID that you are using on phone. Go to Google+ page and join the community.
    2. Next, sign up here to receive updates of the app.
    3. Use the download link provided after you sign up to download the app on your phone.
  5. Open the Flashfire app. Provide it root permissions by tapping on Grant on the pop-up that shows up. (Tap on agree on the Disclaimer pop-up that comes only one time.)
  6. Tap on + button, select Wipe, keep default options checked. Tap on check button at top right.
  7. Tap on + again, select ‘Flash ZIP or OTA’ and then select the ROM file from step 3 here. Tap on check button at top right.
  8. Scroll down and tap on FLASH button. Tap on OK to confirm.

Need more help with flashing the ROM using Flashfire app (steps 5 to 8 above)? Well, check this video. Works for every ROM on every Samsung phone when using Flashfire app.

Once Flashfire is done flashing the debloated OE2 ROM that’s already rooted, and is blazing fast, your AT&T S6 will reboot automatically.

That’s it. Let us know if you know any help with this via comments section below. We’ll be sure to help you.

The post How to Speed up AT&T Galaxy S6 by flashing a debloated OE2 based custom ROM appeared first on The Android Soul.

How to Change App Permissions on Android M

$
0
0

Android M App Permissions

Android M comes with a number of cool new features, but our most favorite so far is the new App management interface with easy controls to manage app permissions to block shady apps from using your data for no good reason.

On Android M you can easily turn off certain permissions for an App that you feel is not necessarily required by the app. This feature is pretty useful as we often come across apps that ask permission to access unnecessary data on our devices (like Contacts, Messages, etc.) while their purpose doesn’t require access to such data. So with Android M, you’ll be able to easily toggle off certain permissions for an app to block it from accessing your data.

How to Change App Permissions on Android M

  1. Go to Settings » select Apps.
  2. Now select the App for which you want to change permissions.
  3. On the App info page, select “Permissions”.
  4. You’ll get a list of permissions allowed to the app along with toggles on the right for each to turn off/on.
  5. While turning off a permission you may get a prompt “Denying permission may cause it to no longer function as intended”, select “Deny”.

That’s all.

The post How to Change App Permissions on Android M appeared first on The Android Soul.

How to Clear App Data and Cache on Android M

$
0
0

Android M App Storage Options

The App info pages have largely stayed the same on Android for a long time now except for the generalized visual changes from holo design and then material in Lollipop. But with Android M, the App info pages are now finally taking a reform with some really cool new features and a simplified interface for everything.

The app info pages has long held the controls to clear App data and cache in pretty much the same style. But now with Android M, these two options are grouped into the Storage option which is accessible from the App info page.

To clear App data and Cache on Android M, you now have to go Storage option first and then chose Clear Data and Clear Cache options from there.

  1. Go to Settings » select Apps.
  2. Now select the App for which you want to clear data and cache.
  3. On the App info page, select “Storage”.
  4. Now press Clear Data and Clear Cache buttons to delete data and cache for the app.

The post How to Clear App Data and Cache on Android M appeared first on The Android Soul.

Nexus 5 not connecting to PC after installing Android M? Try the new USB configuration setting from Developer options

$
0
0

Android M USB Configuration

It looks like Android M is breaking the USB connection with PC as a number of users (included us) weren’t able to connect the Nexus 5 to our PCs after installing the Android M developer preview build. But thankfully, there’s an easy fix.

Android M now has USB Configuration profiles under developer options which apparently upon playing with let us connect our Nexus 5 to the PC. No extra drivers were need to be installed. By default, it seems Android M has PTP (Picture Transfer Protocol) activated on the device and soon as you change it to MTP (Media Transfer Protocol) the device is instantly recognized by the PC.

How to Change USB Configuration on Android M

  1. Go to Settings » About phone » scroll to the bottom and tap on Build number seven times to enable Developer options.
  2. Go back to Settings page and select “Developer options” from here now.
  3. Scroll a bit and you’ll see “Select USB configuration” under Networking options, select it.
  4. Now select the USB mode you want to use from here. We selected the “MTP (Media Transfer Protocol)” from the list and it resolved our issue with Nexus 5 not connecting to the PC.

The post Nexus 5 not connecting to PC after installing Android M? Try the new USB configuration setting from Developer options appeared first on The Android Soul.


You can Enable Cellular Data to be Always Active on Android M for faster network switching

$
0
0

Android M Cellular Data Always Active

Don’t like to fall off the internet even for a few seconds? Well, Android M has you covered with a new feature called “Cellular data always active” which keeps you mobile data always active, even when Wi-Fi is active to facilitate fast network switching.

This is actually a pretty cool feature, but we won’t recommend you to always keep it enabled on your phone if you care about battery life. Keeping mobile data always active alongside WiFi could negatively hurt the battery. We’d be testing it out in the coming days as to how much it effects the battery life, will be sure to share the results.

If you’ve got a Nexus device and have Android M installed, you can try it out from developer options under under Networking features.

How to Enable “Cellular Data Always Active” mode on Android M

  1. Go to Settings » About phone » scroll to the bottom and tap on Build number seven times to enable Developer options.
  2. Go back to Settings page and select “Developer options” from here now.
  3. Scroll down a bit and you’ll see “Cellular Data Always Active” toggle under Networking options.
  4. Enable it and you’ll have fast switching from WiFi to mobile data.

The post You can Enable Cellular Data to be Always Active on Android M for faster network switching appeared first on The Android Soul.

How to enable Multi-window on Android M build on Nexus 5, 6 and 9

$
0
0

Android M Multi-window proof

It has just come to our knowledge that Android M already supports multi-window, but you have to do some tweaking to enable it. Considering Android M is available on some specific Nexus devices, the Nexus 5, 6 and 9, if you are running Android M on these devices already, you can get multi-window pretty easily on these devices.

The hack involves editing the build.prop in the system partition of the device. It would have been ultra easy if proper root solution was available, which isn’t the case, so you have to use ADB in editing the build.prop. We’ve covered a detailed guide below, but let’s just say big thanks to Quinny899, who unearthed the thing.

How to enable Android M multi-window option in Settings

Supported models

  • Nexus 5, Nexus 6 and Nexus 9, running Android M preview build
  • Don’t try on any other device

Warning: Warranty may be void of your device if you follow the procedures given on this page. You only are responsible for your device. We won’t be liable if any damage occurs to your device and/or its components.

Backup necessary stuff. In case your device is wiped off, it’s good to have backup of contacts, photos, videos and other files. Hence, create a backup of important stuff in your phone right away.

You need to activate the hidden option ‘Multi-window’ under the drawing category of Developer option in settings, which in itself is also hidden. The guide will do that first, and then it’s a simple task on enabling the multi-window using the option’s toggle button.

  1. Install new Android M ADB drivers. (If that proves a trouble for you, you can install old drivers easily using this link.)
  2. Install TWRP recovery for your device: Nexus 5, Nexus 6 or Nexus 9.
  3. Boot your phone into recovery mode. For this:
    1. Power off your device first.
    2. Then hold volume down + volume up + power button together to reboot to fastboot mode.
    3. Navigate to Recovery option using volume buttons and then press power button to select and boot into recovery mode.
  4. Connect your device to PC now.
  5. In TWRP, tap on Mount, and then tick the System. Now you will be able to pull the build.prop file from the device.
  6. Now, on PC, with ADB installed, create a new folder anywhere on PC. name it: multi-m
  7. Go into the folder multi-m, and open a cmd window in that folder. Right click on the white space inside the folder while holding shift button, then select ‘Open command window here’.
  8. Now, copy paste the command below and then hit enter key. This will pull the file called build.prop in system partition.
    adb pull /system/build.prop
  9. You’ll have the build.prop file in the folder multi-m. Open it with Notepad++ text editor. Don’t close the command window, and don’t power on the phone either. Leave phone connected.
  10. Find the ro.build.type line in the build.prop file. It’s line no. 14 in build.prop of my Nexus 5.
  11. You’ll find the text user after that. Well, change it to userdebug
    user to userdebug
  12. Save the file, and clode the Notepad++. Now we will push the edited build.prop back into device’s system partition, replacing the old one and setting the permissions back.
  13. Back to cmd window, copy paste the command below and then hit enter key.
    adb push build.prop /system/
  14. For setting permissions we got operate via ADB shell. For this, type adb shell and then hit enter key.
  15. Next, type cd system and then hit enter key.
  16. Set permission on the build.prop file we pushed to system in step 14 above. Copy paste the command below and then hit enter key.
    chmod 644 build.prop
  17. Exit adb shell. Type exit and then use enter key.
  18. On the device, untick the System option in mount.
  19. Go back into TWRP’s main screen, and select Reboot > System. When it asks for SuperSU installation, tap on ‘Do not Install’ because currently, SuperSU is not compatible with Android M.
  20. When your device boots up, go into Settings > Developer options. under the Drawing category, find the option Multi-window mode. Enable it using the toggle button. That’s it.

Enjoy!

Tip: How to use multi-window? Well, After enabling it, just press the Recents key, and then tap on extra icon you see to the left of x button on every app’s window there. You’ll get to select from 3 options, each meant for setting the app to upper half of the screen, or lower part, or full screen. That’s it.

Need any help with this, sure let us know via comments section below.

The post How to enable Multi-window on Android M build on Nexus 5, 6 and 9 appeared first on The Android Soul.

How to Restore/Unbrick LG G4 H815 [Bootloop Fix]

$
0
0

unbrick lg g4

Well, in case you are left with a bricked LG G4, here is how you can restore it back to functionality by flashing a custom ROM that is now available. Of course, you will need to have a TWRP recovery, which we think you already have but if not, just see the guide below for links to download and install TWRP recovery. Know that this unbrick guide is compatible only with LG G4, model no. H815, which is the only device currently supported by LG for bootloader unlock, and is not compatible any other variant of the device.

The LG G4 unbrick method we’ve covered here really easy one, you don’t even need a PC, as you just have to flash one custom ROM from the recovery, and the device shall reboot all fine. yes, this will fix bootloop that you may be getting on your device currently. Credit for the custom ROM goes to well known developer DocRambone, thanks a lot!

One of the possible reasons you unbricked your LG G4 could be due to xposed framework installation which is right now fully compatible with the LG G4, particularly the ARM 64-bit version. Or, you could have played a bit immaturely with system file, because root access is now available too.

Anyway, check out the download links below to unbrick and restore your LG G4.

Downloads

Supported models:

  • LG G4, model no. H815
  • Don’t try on any other variant of G4 with different model number.
  • Don’t try on any other Android device.

Tip: Check the model no. in Settings > About phone. Or, you could also find the model no. on the packaging box of the device.

Installation Instructions

Warning: Warranty may be void of your device if you follow the procedures given on this page. You only are responsible for your device. We won’t be liable if any damage occurs to your device and/or its components.

Backup necessary stuff. In case your device is wiped off while following the guide below, it’s good to have a backup of contacts, photos, videos and other files already saved on PC.

  1. Make sure have Unlocked bootloader of LG G4. That’s a must, as without this, device remains locked by LG and you the user cannot install TWRP recovery. You will also get to install ADB and LG drivers in that guide, so we will skip the drivers part here.
  2. Make sure you have installed TWRP Recovery on LG G4.
  3. Download the custom ROM file, Doc_Test.zip, from above.
  4. Connect your LG G4 to PC.
  5. Copy the ROM file to phone now and remember its location on phone.
  6. Reboot into recovery mode.
    1. Open the command window at the location where you have the TWRP recovery. For this, while holding shift key, right click from mouse on the white space inside the folder. You’ll get a pop-up as shown below. Select the option: Open command window here
      open command windows here
    2. A command (cmd) window will open up. Now, copy the command below and paste it in command window, and then hit Enter key.
      adb reboot recovery
  7. Flash custom ROM now. In TWRP recovery, tap on Install, and then browse to ROM file (Doc_Test.zip) and tap on it to select it for installation. On next screen, just do the ‘Swipe to Confirm Flash’ to install root on LG G4.
  8. You will get Successful written in blue text on next screen, tap on Reboot System. Wait for the device to boot up.

You bricked LG G4 should restart alright now. That’s all you needed to do to unbrick LG G4. Enjoy it!

If you need any help with LG G4 unbrick, be sure to tell us using the comments section below.

The post How to Restore/Unbrick LG G4 H815 [Bootloop Fix] appeared first on The Android Soul.

Get HTC Desire 816 Lollipop WiFi Fix here by Installing Official update

$
0
0

htc desire 816 lollipop wifi fix

Your HTC Desire 816 may be playing foul with WiFi connection if you updated it recently using a custom recovery (TWRP/CWM). This is because flashing the Android 5.0 Lollipop update via recovery didn’t really install all components of the upgrade that a firmware would, and hence the WiFi bug.

But anyway, you can fix the WiFi bug right away on your HTC Desire 816 dual-sim handset by installing the official firmware right away — download link to firmware and guide on how to install it is provided below.

Note that installing the firmware given below requires you to be on certain software version already, which is, 1.58.401.11 or 2.34.401.1. If you are not on any of these two software version, the update may fail. So, be sure to update first to either of these two software version to be able to fix WiFi connection by installing this update.

And be sure to match the CID of your current device if you are S-ON, it must match for your device to be compatible with this firmware update. If you are S-Off though, you are a free bird, flash it, it will do fine.

Here’s how to Fix WiFi on HTC Desire 816 on Lollipop update.

Downloads

Supported models:

  • HTC Desire 816, model no. A5_DUG
  • Don’t try on any other variant of HTC Desire 816 or any other HTC Desire set.
  • Don’t try on any other Android device.

Tip: Check the model no. in Settings > About phone. Or, you could also find the model no. on the packaging box of the device.

Installation Instructions

Warning: Warranty may be void of your device if you follow the procedures given on this page. You only are responsible for your device. We won’t be liable if any damage occurs to your device and/or its components.

Backup necessary stuff. In case your device is wiped off while following the guide below, it’s good to have a backup of contacts, photos, videos and other files already saved on PC.

  1. Install ADB and ADB Drivers, as it must be working all fine. Skip this step if you already have ADB working properly.
  2. Also install HTC drivers too if you haven’t already.
  3. Download the firmware.zip file on your PC.
  4. Open command window where you have the firmware.zip file. Go into the folder, and then while holding the shift key, right click on empty white space to get a pop-up, then choose the option ‘Open command window here’.
  5. Connect your HTC Desire 816 to PC now.
  6. In cmd window, hit enter key after typing: adb reboot bootloader
  7. Your Desire 816 will reboot into fastboot mode. Now, if you are S-ON (see that written at top on this white screen?), you will need to re-lock bootloader of your Desire 816 (this will erase your apps, games, photos, etc. everything from internal storage). If you are S-Off, you don’t need to do this, skip this step. S-ON users type this command and hit enter key: fastboot oem lock
  8. Now, reboot into fastboot RUU mode. Run this command: fastboot oem rebootRUU
    Tip:
    You should be able to see HTC logo in silver in the middle of a black screen.
  9. Now, we will install the stock Android 5.0.2 recovery for Desire 816, by flashing the firmware.zip now. Run this command: fastboot flash zip firmware.zip
  10. Re-run the above command again: fastboot flash zip firmware.zip
  11. Reboot into fastboot mode again by running this command: fastboot reboot bootloader

WiFi is fixed on your HTC Desire 816 now, but it doesn’t have the TWRP recovery and has lost root access too.

If you wish to get root and install TWRP recovery again, you will have to unlock bootloader again on S-On devices. S-Off devices don’t need to. And then simply install TWRP recovery again, and then flash the SuperSU file to gain root access.

The post Get HTC Desire 816 Lollipop WiFi Fix here by Installing Official update appeared first on The Android Soul.

Get these brilliant LG G3 Watchfaces!

$
0
0

Best LG G3 Watchfaces

LG G3 was launched with one of its highly marketed features, the Quick Circle case. While not a benchmark venture in this field, the implementation utilized a circular cut-out window for more than just answering phone calls. Its presence was extended to widgets and full blown apps as well. Despite its multiple uses, the Quick Circle case is best known for circular clocks, which allows the user to place circular widgets on the home screen that remain visible through the cut out. However, the default clocks provided by LG have limited options and anything stays the same for a while and tends to get monotonous.

The lack of options in Quick Circle clocks created a chance for developers to show their skills. The community famous worldwide created many such clocks with the help of recognized themer and developers, which mainly serve to increase the variety of options. From the minimal time only clocks to full blown weather information displays are available and you can make one yourself as per your choice. The mod is in the form of a standard apk, but it requires you to root your device and install Xposed Framework to run. Root + Xposed not only offers you option in Quick Circle Case but also many modules where the user can capitalize as per his taste.

Note: For this feature to work properly you need to root your device and install Xposed Framework.

Supported models:

  • Currently this feature is available on all G3 models as far as they have the latest QC Themer

Warning: Warranty may be void of your device if you follow the procedures given on this page. You only are responsible for your device. We won’t be liable if any damage occurs to your device and/or its components.

Backup necessary stuff. In case your device is wiped off while following the guide below, it’s good to have a backup of contacts, photos, videos and other files already saved on PC.

  1. The device needs to be rooted, if it isn’t, then root your LG G3 from here.
  2. Once rooted, install the Xposed framework on your G3, which you can get it from here.
    1. Download the Xposed Installer App’s APK.
    2. Install Xposed Install using the APK file. Tap on the app using a file manager. For more help, see here.
    3. Open the Xposed app, and tap on Framework, and then on Install/Update.
    4. Provide app root access by tapping on Grant button when you get a pop-up.
    5. Reboot your phone thereafter by tapping on Reboot.
  3. After the installation of the Xposed framework, you need to download QC Themer xposed module (QC – Quick Circle). Download the APK and install it too.
  4. Enable QC Themer module in Xposed app. Open the Xposed app, tap on Modules, tick the checkbox to the left of QC Themer module there, and reboot your phone (go back, then in framework tap on reboot).
  5. Now, download the real deal, the watchfaces from here. These .zip files, transfer them to phone if you download them on PC.
  6. Open the Quick Circle Themer app, and import the .zip file of the watchface you want.
  7. Click On Apply to switch to given watchface.
  8. Restart your G3. That’s it. Enjoy!

That’s it. Need any help with this, let us know in comments.

The post Get these brilliant LG G3 Watchfaces! appeared first on The Android Soul.

Root Asus Zenfone 2 and fix ‘no camera is found’ bug

$
0
0

Asus Zenfone 2 Root Camera Fix

If you rooted your Zenfone 2 using the old one click root tool, there are chances that you got the ‘no camera is found’ bug creaking into your phone. Root solution tweak the system to attain superuser access and sometimes, things do get break when you root your Android device.

Anyway, there is a simple new one click root solution available to root and fix the Asus Zenfone 2 ‘no camera if found’ issue — all you have to do is download the fix given below, and run its .bat file after extracting the files.

Here’s how to root and fix ‘no camera is found’ bug on Asus Zenfone 2.

Downloads

Supported models:

  • Asus Zenfone 2, model no. T00F/T00J
  • Don’t try on any other variant of Zenfone 2 or all series, with different model no.
  • Don’t try on any other Android device.

Tip: Check the model no. in Settings > About phone. Or, you could also find the model no. on the packaging box of the device.

Installation Instructions

Warning: Warranty may be void of your device if you follow the procedures given on this page. You only are responsible for your device. We won’t be liable if any damage occurs to your device and/or its components.

Backup necessary stuff. In case your device is wiped off while following the guide below, it’s good to have a backup of contacts, photos, videos and other files already saved on PC.

  1. This was tested on software version 2.22.40.54 of WW model of Zenfone 2. So, make sure yours is a WW model and is running version 2.22.40.54. You can try this even if you are not exactly on 2.22.40.54, and it might work too. Otherwise, wait for the v2.22.40.54 OTA update to hit your device, and then try.
    Tip: Btw, in case this root tool doesn’t work for you, you can unroot your device and fix the bug too by installing the v2.17.40.12 firmware — download from here, and flash using guide here. (This is Zenfone 5’s guide but installation procedure is exactly same.)
  2. Make sure you have ADB and ADB drivers installed and working.
  3. Enable USB Debugging. Go to Settings > About phone, and then tap Build number seven times. Now, go back to Settings and then into Developer options. Find USB Debugging option, and use toggle button to enable it. Tap on OK to accept warning.
  4. Download the root script from above, and extract it to any folder on PC. Name it: z2-root
  5. Now, in z2-root folder, you must be having all these files.
    Zenfone 2 Fix
  6. Connect your Zenfone 2 to PC.
  7. Open the command window in z2-root folder. For this:
    1. While holding shift key, right click from mouse on the white space inside the folder. You’ll get a pop-up as shown below.
      open command windows here
    2. Select the option: Open command window here
  8. Boot Zenfone 2 into fastboot mode. Copy the command below and paste it in command window. Then hit enter key.
    adb reboot bootloader
  9. Now, run the following commands one after one to unlock fastboot on Zenfone 2. Copy paste one command at a time, and then hit enter key to run that command. Do this for both commands one by one.
    fastboot flash fastboot files/root/fastboot.img
    fastboot reboot-bootloader
  10. Now, unlock bootloader of Zenfone 2. Run the command below one by one.
    fastboot flash dnx files/vanilla/dnx_fwr_ctp_a500cg.bin
    fastboot flash ifwi files/root/ifwi_ctp_a500cg.bin
    fastboot reboot-bootloader
  11. Now, root Zenfone 2. Run each command one by one.
    fastboot flash recovery files/root/recovery.img
    fastboot flash update files/root/dummy.zip
    adb reboot bootloader
  12. Restore original files, so that ‘no camera is found’ bug is fixed.
    fastboot flash fastboot files/vanilla/fastboot.img
    fastboot flash recovery files/vanilla/recovery.img
    fastboot flash dnx files/vanilla/dnx_fwr_ctp_a500cg.bin
    fastboot flash ifwi files/vanilla/ifwi_ctp_a500cg.bin
    fastboot reboot

That’s it. Enjoy your rooted Asus Zenfone 2 with camera bug also fixed.

If you need any help this, let us know in comments below.

The post Root Asus Zenfone 2 and fix ‘no camera is found’ bug appeared first on The Android Soul.

Download PowerAMP APK with Android M Support

$
0
0

Poweramp

With Android M, many apps were incompatible at the beginning and slowly, app developers are making required modifications to their apps to support Android M. One of our favorite music players, PowerAMP, was not compatible with Android M from the outset, but its developers have now updated the app to support Android M.

So, if you are on Nexus 5, 6 or 9, and can’t live without PowerAMP, you have a lot to cheer for. Download the new PowerAMP APK from below, and install it like regular APK.

The Android M compatible PowerAMP that you are downloading from below is a beta version, yet to make it to play store. It’s really nice of PowerAMP team to come with a working Android M beta version of their app quickly enough.


Download

If you need help with installing an APK file, see here.

What’s in this version:

  • fixed crash on M-preview
  • few other minor fixes
  • 580: even more improved track state saving during bluetooth connection
  • 580: MusicFX is disabled by default now for Sony @ Lollipop (as it’s broken there)
  • 578: improved track state saving during bluetooth connection
  • 578: better 3rd party skin failures handling

The post Download PowerAMP APK with Android M Support appeared first on The Android Soul.


How to SIM Unlock Sprint Galaxy S6 and S6 Edge, GSM fully working!

$
0
0

SIM Unlock Sprint Galaxy S6

If you have a Sprint Galaxy S6 or S6 Edge outside US (business or holiday trip, for example), and want to use it over a GSM network, then it’s possible to do that now. You would need root access on your Sprint S6, and then some apps we’ve shared below, and you’re good to go for it.

The main requirement is that your Sprint Galaxy S6 must be on OE2 firmware. It’s the latest, but if you don’t have it, go to Settings > About phone > System updates, and then tap on update button to get the OE2 OTA update now. Btw, you can also simply flash the OE2 firmware to update manually to update — see step 1 of our guide below.

Here’s how to SIM unlock Sprint Galaxy S6 for GSM carriers.


Downloads

Supported models:

  • SPRINT GALAXY S6, model no. SM-G920P
  • Don’t try on any other variant of Galaxy S6 with a different model no.
  • Don’t try on any other Android device.

Tip: Check the model no. in Settings > About phone. Or, you could also find the model no. on the packaging box of the device.

Installation Instructions

Warning: Warranty may be void of your device if you follow the procedures given on this page. You only are responsible for your device. We won’t be liable if any damage occurs to your device and/or its components.

Backup necessary stuff. In case your device is wiped off while following the guide below, it’s good to have a backup of contacts, photos, videos and other files already saved on PC.

  1. Download the update from here, and use our guide on Odin software to install the update using Odin from here (guide is not on Sprint S6 exactly but works perfectly).
  2. Root your Sprint Galaxy S6 with PingPong root tool. Check this page for guide on how to do that, plus download link for root tool. Works all fine for your Sprint S6.
  3. Download the two apps provided above. Copy them to your phone if downloaded them on PC.
  4. Now, install both of the apps. (Here’s how to install Apps using APK file.)
    • Install the GTv3.15 first, you will find it by the name of idone app in the app drawer. Next install the GTUpdate2_v3.18, aka, Galaxy Tools app.
  5. Run the Galaxy Tools app, grant it root permission and then tap on update. Then reboot your device.
  6. Now run the idone app, and tap on SIM UICC unlock button. Reboot thereafter.
  7. Select GSM/UMT network. Go to Settings > Mobile networks > Network mode, and then select GSM/UMTS.
  8. You should receive the signal now, try making a call now.

If you need help, do look here.

Let us know in comments section below if you need any help with this.

The post How to SIM Unlock Sprint Galaxy S6 and S6 Edge, GSM fully working! appeared first on The Android Soul.

How to install Stock Recovery and Cache on Sprint Samsung Galaxy S6 Edge manually

$
0
0

Samsung-Galaxy-S6-Edge

For Samsung Galaxy S6 users who have rooted their devices with CF Auto root and want to return to stock recovery which comes pre-installed with the device, here is a guide to do so. As you may be knowing, any changes you make to system partition makes your device incompatible with OTA updates, and the only way to accept OTA updates again is flashing Samsung stock recovery and cache partition back.

But btw, if you have changes to system partition yourself, other than CF Auto Root, then you will need to restore them back to and flashing a stock recovery won’t do alone — you will need to flash whole firmware again, which is also provided below.

All in all, if you have used CF Auto Root and have not done any other changes to system, restoring the stock recovery and cache will do for you to accept OTA update. However, if you have made a lot of changes to system, like deleting system apps, installing xposed framework, etc. flashed mods into recovery, then you need to flash the full firmware file below.

Let’s see how to install stock recovery back on Sprint Galaxy S6 running OCF firmware, to get OTA ability of the device back.

Downloads: 

NOTE: Installing a firmware (large download of 1.5 GB is fine, and it covers recovery too. But if you are running OCF firmware (see step 1 below) and have only rooted using CF Auto Root, then we suggest you simply install the OCF recovery, a small download, to get OTA back.

Supported models

  • SAMSUNG SPRINT GALAXY S6, model no. SM-G925P
  • Don’t try on any other S6 set with different model no, or any other device whatsoever

Disclamer: Installing stock recovery through Odin doesn’t void your device’s warranty, but it remains an unofficial process and thus you need to be cautious of it. In any case, you only are responsible for your device. We won’t be liable if any damage occurs to your device and/or its components.

Important Note: Backup important files stored on your device before proceeding with the steps below, so that in case something goes wrong you’ll have backup of all your important files. Sometimes, Odin installation may delete everything on your device!

Installation Instructions:

  1. If you intend to install stock recovery, make sure your device is running on OCF firmware. Go Settings > About phone, and check build no. for this. But if you are looking to install the whole of firmware
  2. Download Odin and firmware file from above.
  3. Install Galaxy S6 Edge drivers (method 1 there!) first of all. Double click the .exe file of drivers to begin installation. (Not required if you have already done this.)
  4. Extract the Odin file. You should get this file, Odin3 v3.10.6.exe (other files could be hidden, hence not visible). Also extract the firmware file, SPR-G925PVPU1AOCF-20150415164450.zip, if you intend to flash the firmware instead of recovery file.
  5. Disconnect your Galaxy S6 Edge from PC if it is connected.
  6. Boot Sprint Galaxy S6 Edge into download mode:
    1. Power off your S6 Edge. Wait 6-7 seconds after screen goes off.
    2. Press and hold the three buttons Volume Down + Power + Home together until you see warning screen.
    3. Press Volume Up to continue to download mode.
  7. Double click on extract file of Odin, Odin3 v3.10.6.exe, to open the Odin window, as shown below. Be careful with Odin, and do just as said to prevent problems.
    Odin 3.10.6
  8. Connect your Galaxy S6 Edge to PC now using USB cable. Odin should recognize your S6 Edge. It’s a must. When it recognizes, you will see Added!! message appearing in the Log box in bottom left, and the first box under ID:COM will also show a no. and turn its background blue. Look at the pic below.
    • You cannot proceed until Odin recognizes your phone and you get the Added!! message.
    • If it doesn’t, you need to install/re-install drivers again, and use the original cable that came with phone. Mostly, drivers are the problem.
    • You can try different USB ports on your PC too, btw.
      Odin 3.10.6 Added message
  9. Click on the AP tab in Odin and select the the stock recovery file, G925P_OCF_RecoveryCache.tar (btw, if you intend to flash the full firmware, then select the firmware’s .tar.md5 file).
    Odin 3.10.6 Firmware loaded after md5 check
  10. Make sure Re-partition checkbox is NOT selected, under the Options tab. Don’t use PIT tab either. Go back to Log tab btw, it will show the progress when you hit start button in next stepRe-partition Remains Off
  11. Click the Start button on Odin now to start flashing the recovery on your Sprint Samsung Galaxy S6 Edge. Wait until installation is finished, after which your Galaxy S6 Edge will reboot automatically. You’ll get PASS message as show below upon successful installation from Odin.
    • If Odin gets stuck at setup connection, then you need to do steps 4 to 11 again. For this, close Odin, disconnect your S6 Edge, remove battery, insert it back after 5-6 seconds and then start from step 6 again.
    • Or, if you get FAIL in the top left box, you need to try flashing again, as stated just above.
      Odin 3.10.6 Pass Message Appears

Once reboot you are ready to go.

If you face any issues over installing the OCE firmware or its stock recovery on your AT&T Galaxy S6 Edge, let us know via comments below. We’ll try our best to help you.

The post How to install Stock Recovery and Cache on Sprint Samsung Galaxy S6 Edge manually appeared first on The Android Soul.

Make Verizon HTC One M9 faster with a lightweight debloated custom ROM!

$
0
0

HTC One M9

With 3GB RAM and Snapdragon 810 processor teamed up inside the HTC One M9, it’s no doubt a speed demon. But that’s not to say he One M9 cannot improve. It definitely can, if you remove the unnecessary apps that hog the system and constantly use RAM, and that’s what the custom we are sharing with you today does, but take note that it is compatible only with Verizon HTC One M9, not any other variant or device.

The Verizon HTC One M9 comes packed with lots of bloatware — Verizon requested apps, that is — that most users don’t need. The custom ROM’s name is Onyx, and it’s version 1.6.1 tat is available for download as of today. ROM consists of several tweaks which make the rom all the more likable.

The ROM is based on HTC firmware v1.33.605.15, and runs on Android 5.0.2 Lollipop, topped with Sense 7. Like most of the custom ROMs, it’s been deodexed too, so it’s easy for you to install a theme if you find one. Care has been taken such that the rom is as close to stock HTC build as much, so you will so no modifications to UI and such. ROM promises you nearly the same experience, only faster.  Onyx ROM is still in its Beta stage as regards development, but it is stable to be your daily driver. Credit to the ROM goes to Cykhet, thanks!

Downloads:

  • Onyx custom ROM | File: OnyxROM-v1.6.1_Beta_06-08-15_065840.zip (1.4 GB)

To download latest version available of the ROM, check this page.

Supported models

  • Verizon HTC One M9
  • Don’t try this on HTC One M9 sets at AT&T, T-Mobile, US Cellular or any other variants
  • Don’t try on any other device whatsoever

Prerequisites:

  • Root
  • S-OFF,
  • Unlocked Bootloader,
  • TWRP RECOVERY for flashing
  • Onyx ROM

Warning: 

Warning: Warranty may be void of your device if you follow the procedures given on this page. You only are responsible for your device. We won’t be liable if any damage occurs to your device and/or its components.

Installation Instructions:

Make sure you backup everything including messages, contacts, photos, documents, media etc. just in case anything goes wrong or you wipe everything accidentally.

  1. You will need S-Off on your Verizon HTC One M9 for this. By default it’s S-On, in which case you cannot install this ROM. Get S-Off here. To check if you have S-Off, reboot to bootloader mode and see what’s written at the top.
  2. Next, you will need to unlock bootloader of your Verizon One M9. Look here.
  3. Then make sure you have the TWRP recovery.
  4. In case you don’t have them already, be sure to install ADB and ADB drivers.
  5. Now, download the ROM from above and transfer it to phone’s internal storage.
  6. Reboot your phone into recovery mode.
  7. [Optional] It’s highly recommended you create a backup. Select Backup, then do a “Swipe to Back Up” on the bottom of the screen. Wait for the backup to finish, it’s a time consuming process.
  8. Wipe your device. Once the backup is finished, do this: tap on Wipe, then Advanced wipe, and then select Cache, Dalvik/ART cache and Data. Then do the “Swipe to wipe” at bottom to ready the device for ROM flashing by erasing the cache, dalvik cache and data in one shot.
  9. Install ROM now. Go back to the main menu of TWRP recovery and select Install. Navigate to the file where you saved your Onyx ROM’s zip file, select it and “Swipe to Confirm Flash” on the bottom of the screen. Now wait until the flashing process finishes.
  10. Go to back to recovery’s Main menu, select Reboot » select System.

That’s it. Let us know if you know any help with this via comments section below. We’ll be sure to help you.

Onyx ROM Features

  • System, Cache and Data partitions are trimmed after installation.
  • Debloated: most VZW applications have been removed, excluding those which are required for core functionality.
  • WiFi / USB Tethering enabled
  • Visual Voice Mail enabled
  • Power Saver setting enabled and on by default.
  • Reconfigured, reorganized Apps menu.
  • FM Radio added.
  • VZW Help replaced with HTC Help.
  • Music Channel functionality enabled, added to settings menu.
  • Init.d support added.
  • Auto-Reporting / Logging for HTC / Google / Verizon has mostly been disabled.
  • SuperSU installed.
  • Default Home pages reduced to 2: Blinkfeed and Home-Screen.
  • Removed Sense “Smart Folder” widget from the default Home-Screen, still accessible from the widgets menu.
  • Default HTC Theme / Accent Colors have been modified for Onyx. The “HTC Default” accent colors have been added to Accent Colors.

Bugs:

  • Intermittent issue where default ringtone won’t be applied after initital setup.

The post Make Verizon HTC One M9 faster with a lightweight debloated custom ROM! appeared first on The Android Soul.

How to boot into LG G4 Recovery Mode

$
0
0

Booting-into-Recovery-Mode

If you need help with how to boot the LG G4 recovery mode, you have come to right place. With each OEMs using a different combination of keys to manually boot into recovery mode, and that too sometimes different for their own range of devices, it becomes a tedious task to boot into recovery mode effortlessly. You have got to have exact idea of when to press what buttons to enter recovery mode, from where you can do a factory reset to wipe your device. For LG G4, LG’s chosen a not so common method, and thus you have to be careful to use exact key combo as provided below. Also, be sure to have TWRP recovery installed as said in step 1 below, with links to installation.

Knowing LG G4 recovery mode is particularly helpful when you have installed a TWRP/CWM recovery too, as you may be installing different custom ROMs every now and then. Plus, you can create cool backup from TWRP/CWM that lets you unbrick the device by using the restore feature.

Important Note: Please make sure you install a custom recovery before, because your data will be lost if you don’t have a custom recovery like TWRP/CWM installed.

Supported models:

  • LG G4, any variant
  • Don’t try on any other Android device

Boot into LG G4 Recovery Mode Using HARDWARE buttons

  1. Make sure you have a custom recovery. If you don’t have a custom recovery like CWM or TWRP installed, this will factory reset your phone, and will wipe off everything on your device: apps, games and game progress, settings, etc. By default, you don’t have a custom recovery, so make sure you have installed one: Get LG G4 TWRP here.
  2. To enter into Recovery mode on G4, first Power Off your device. Then wait for 6-7 seconds after screen goes off.
  3. Now, press and hold  Volume Down and Power Button for 5-10 seconds until the LG logo appears.
  4. As soon as the LG logo appears, release the Power button for 1 second and then hold it back.
  5. You will see a white screen with some options available.
  6. Use volume up and down to select Yes or No and Power Button to authorize the selection.
  7. You’ll boot into recovery mode.

Note: You can check the video for better understanding from here.

Need any help with this, let us know in comments.

The post How to boot into LG G4 Recovery Mode appeared first on The Android Soul.

LG G4 Hacks: Improve Camera performance with 60 FPS recording

$
0
0

G4 camera mod 60fps+100%qualtiy+flash mod

LG did great with camera of its 2015 flagship device, the G4, but did you know you can take it to the next level all by yourself. The road’s not easy, you will have to install TWRP recovery on your G4 first, and then install the .zip file we’ve provided below. Of course, we have got the links to help you with TWRP recovery installation (see the guide below) but before that, let’s talk what improvement we’re talking about here.

Even though LG has upped a level in the camera department with G4, it still misses out on few basic features. Thankfully though, developers around the world have managed to overcome that haul as well. LG G4 has a shortcoming when it comes to the FPS rate while recording videos. The Full HD recording is done at yesteryear’s 30 FPS rate, but with this hack, you will be recording at modern 60 FPS rate. There are certain additional updates in the mod which increase the bit-rate and the photo quality to 100%. Also, you will be able to use the camera even after battery level drops to less than 15% (default), up to 5%. Credit for the mod goes to Pfeffernuss, thanks!

Note: The mod increases the file sizes of videos by a large amount. Keep that in mind.

LG G4 Better Camera Mod

Let’s see how to improve LG G4’s camera.

Downloads

The name of each mod says wat the mod does. All support 60 FPS recording, while bit-rate differ in each one. Install one of your choice. And, when you want to remove/uninstall the mod, and want the LG’s own settings back, simply install the revert to stock file.

Supported models

  • LG G4, model no. H815
    Why only H815 model no.? Well, you need TWRP recovery for this and only H815 has it available, because LG provides bootloader unlock for only this one, which is a must for TWRP installaiton.
  • Don’t try on any other variant of G4.
  • Don’t try on any other Android device.

Installation Instructions

Warning: Warranty may be void of your device if you follow the procedures given on this page. You only are responsible for your device. We won’t be liable if any damage occurs to your device and/or its components.

Backup necessary stuff. In case your device is wiped off while following the guide below, it’s good to have a backup of contacts, photos, videos and other files already saved on PC. Follow the instructions from #9 if you already have your device rooted.

  1. Unlock bootloader of LG G4. That’s a must, as without this, device remains locked by LG and you the user cannot install TWRP recovery. You will also get to install ADB and LG drivers in that guide, so we will skip the drivers part here.
  2. Install TWRP Recovery on LG G4.
  3. Download the camera mod of your choice from above. Better download all the mods, and the stock restore file.
  4. Connect your G4 and transfer all the downloaded files to your G4.
  5. Reboot into recovery mode.
    1. Open the command window at the location where you have the TWRP recovery. For this, while holding shift key, right click from mouse on the white space inside the folder. You’ll get a pop-up as shown below. Select the option: Open command window here
      open command windows here
    2. A command (cmd) window will open up. Now, copy the command below and paste it in command window, and then hit Enter key.
      adb reboot recovery
  6. Once you’re into TWRP recovery, choose “Install” from main menu and then select the mod file you want to install (that you transferred in step 4). Do a ‘Swipe to Confirm Flash’ at bottom to install the mod.
  7. Once done, go back to main screen using the Home button at bottom left, and then tap on System > Reboot.

You are now having a modded camera for LG G4 , enjoy 60fps recording!

If you need any help with your LG G4, feel free to tell us using the comments section below.

The post LG G4 Hacks: Improve Camera performance with 60 FPS recording appeared first on The Android Soul.

Viewing all 2963 articles
Browse latest View live


<script src="https://jsc.adskeeper.com/r/s/rssing.com.1596347.js" async> </script>